How to Seam Crochet Pieces Invisibly with the Mattress Stitch
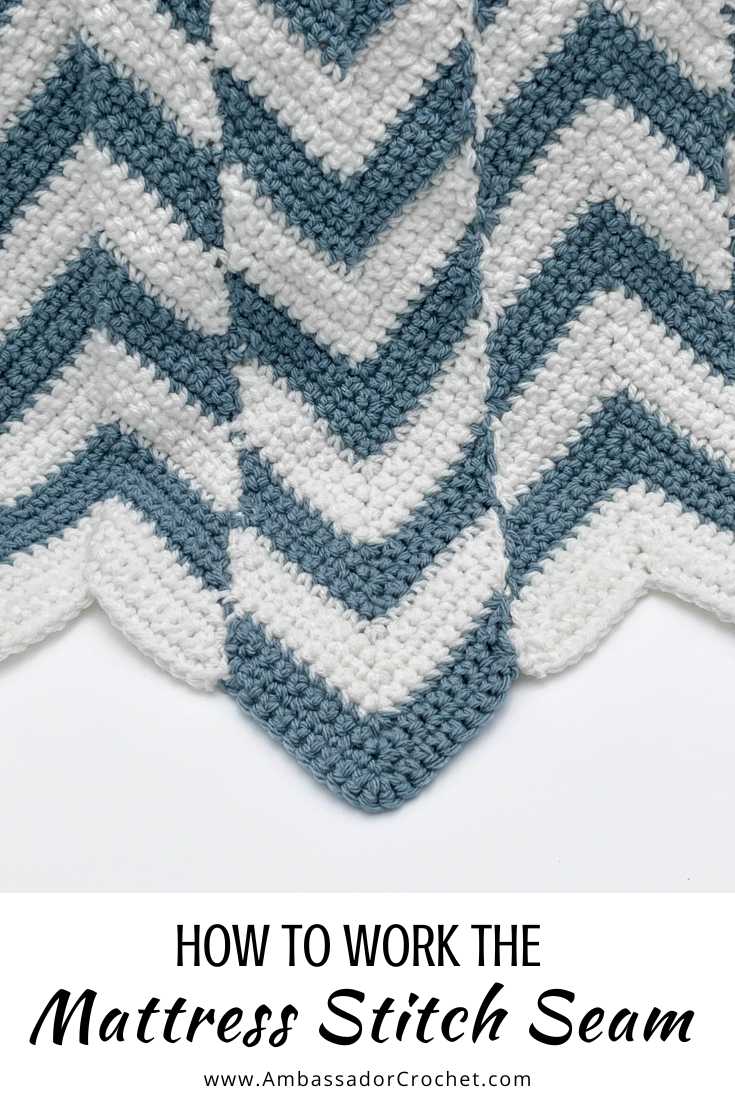
When it comes to finishing a crochet project, a clean, invisible seam can make all the difference—and that’s where the mattress stitch comes in. This simple yet effective joining technique creates a smooth, professional-looking finish that is perfect to use when joining different colors together.
In this tutorial, I’ll walk you through how to work the mattress stitch step-by-step so you can confidently join your crochet sections with a seamless look every time.

What You’ll Need
Yarn: Any yarn from your project – I normally use one of the colors that I am using (I used blue for my American Flag blanket and I used white for my Shifting Chevrons Blanket)
Notions: Yarn Needle
Tips:
- For crochet, it works best when seaming rows to rows (like in blankets or squares).
- Always seam with the right side facing you — that’s where the invisible join appears!

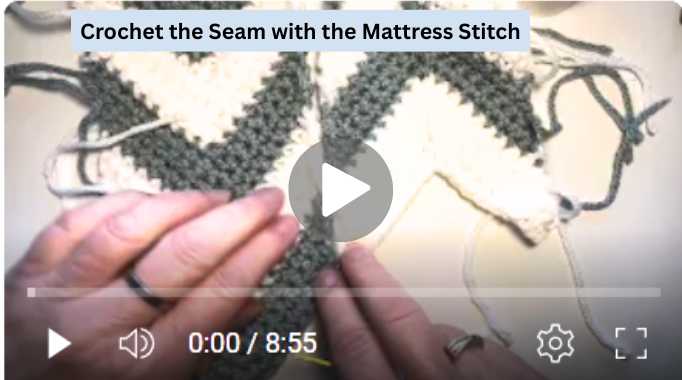
MATTRESS STITCH TUTORIAL
Step-by-Step Instructions:
1. Lay the Pieces Side by Side
Place your two crochet pieces right sides up, edges touching.
(You’ll be working through the center of the edges — not around the 2 stitches like a whip stitch.)
2. Locate the Stitch Loops
Look at the edge stitches on each piece. You’ll see a the edges of each stitch (row-end).
→ You’ll insert your needle under the horizontal bar (or between the front and back bar of the stitch) on one side, then the other.
3. Start the Seam
- Thread your needle with yarn.
- Insert the needle under the bar of the first stitch on the right piece
- Come back down to the bottom of the first stitch on the left piece
- Insert the needle under the bar of the first stitch on the left piece.
4. Continue Alternating Sides
Pull the yarn through — not too tight yet!
Then go back to the next stitch on the first side, then the next on the second side, and so on, zig-zagging between the pieces.
5. Tighten the Seam
After every few stitches, gently pull the yarn — you’ll see the seam pull together neatly and disappear!
Keep adjusting tension so it’s snug but not puckered.
6. Finish and Weave In Ends
Once you’ve reached the end, secure the yarn with a small stitch and weave in the ends on the wrong side.
Don’t miss any tutorials or new pattern releases! Be sure to sign up for my weekly updates here!
PROJECTS IT’S GOOD FOR
You can use the mattress stitch to sew almost any crochet pieces together, but I prefer to use it for garments and/or seams where two colors meet (and don’t want to see what color yarn you used to sew the pieces together).
Happy Crocheting!