Post Stitch Textured Granny Square – Free Blanket Square Crochet Pattern
If you love the classic look of granny squares but want something with a little extra depth, this textured granny square pattern is the perfect project. By incorporating post stitches throughout the design, this square creates beautiful raised details that add dimension while still maintaining the familiar charm of a traditional granny square. The result is a unique twist on a timeless crochet favorite that’s both fun to make and stunning to showcase.
One of the best things about granny squares is their portability. They’re small enough to toss in your project bag, which makes them the perfect take-along project for waiting rooms, road trips or lunch breaks. In fact, they’re good for anytime you just want a little crochet on the go.

Pattern Info
Finished Size: 8″ square
Yarn: #4 worsted weight
Sample used: KnitPicks Brava in Gray – 1.6 oz/100 yds (for total square)
Crochet Hook: Size H/8 (5 mm)
Notions: Yarn Needle
Difficulty: Adv Beginner: Uses beginner stitches, post stitches, and increases.
Stitches Used:
blo – back loop only
BPdc – Back Post double crochet
ch – chain
dc – double crochet
sc – single crochet
yo – yarn over
For a full list of abbreviations, please see my List of Abbreviations.
Notes:
- Changing color every round gives the square a unique way to make the colors pop.
- Gauge is not too important with this square. Just make sure if you are making multiple squares (ex: for a blanket) that your gauge stays the same. That way they will all be the same size.
Special Stitches:
- Magic Ring – for tutorial, please see How to Make a Magic Ring
- FPdc (Front Post double crochet) – yo, insert hook from front to back to front around post of st indicated, yo, pull up loop, [yo, pull through 2 loops] 2 times. Visit tutorial here
- BPdc (Back Post double crochet) – yo, insert hook back-to-front-to-back around post of indicated st, yo, pull up loop, [yo, pull through 2 loops] twice. Visit tutorial here
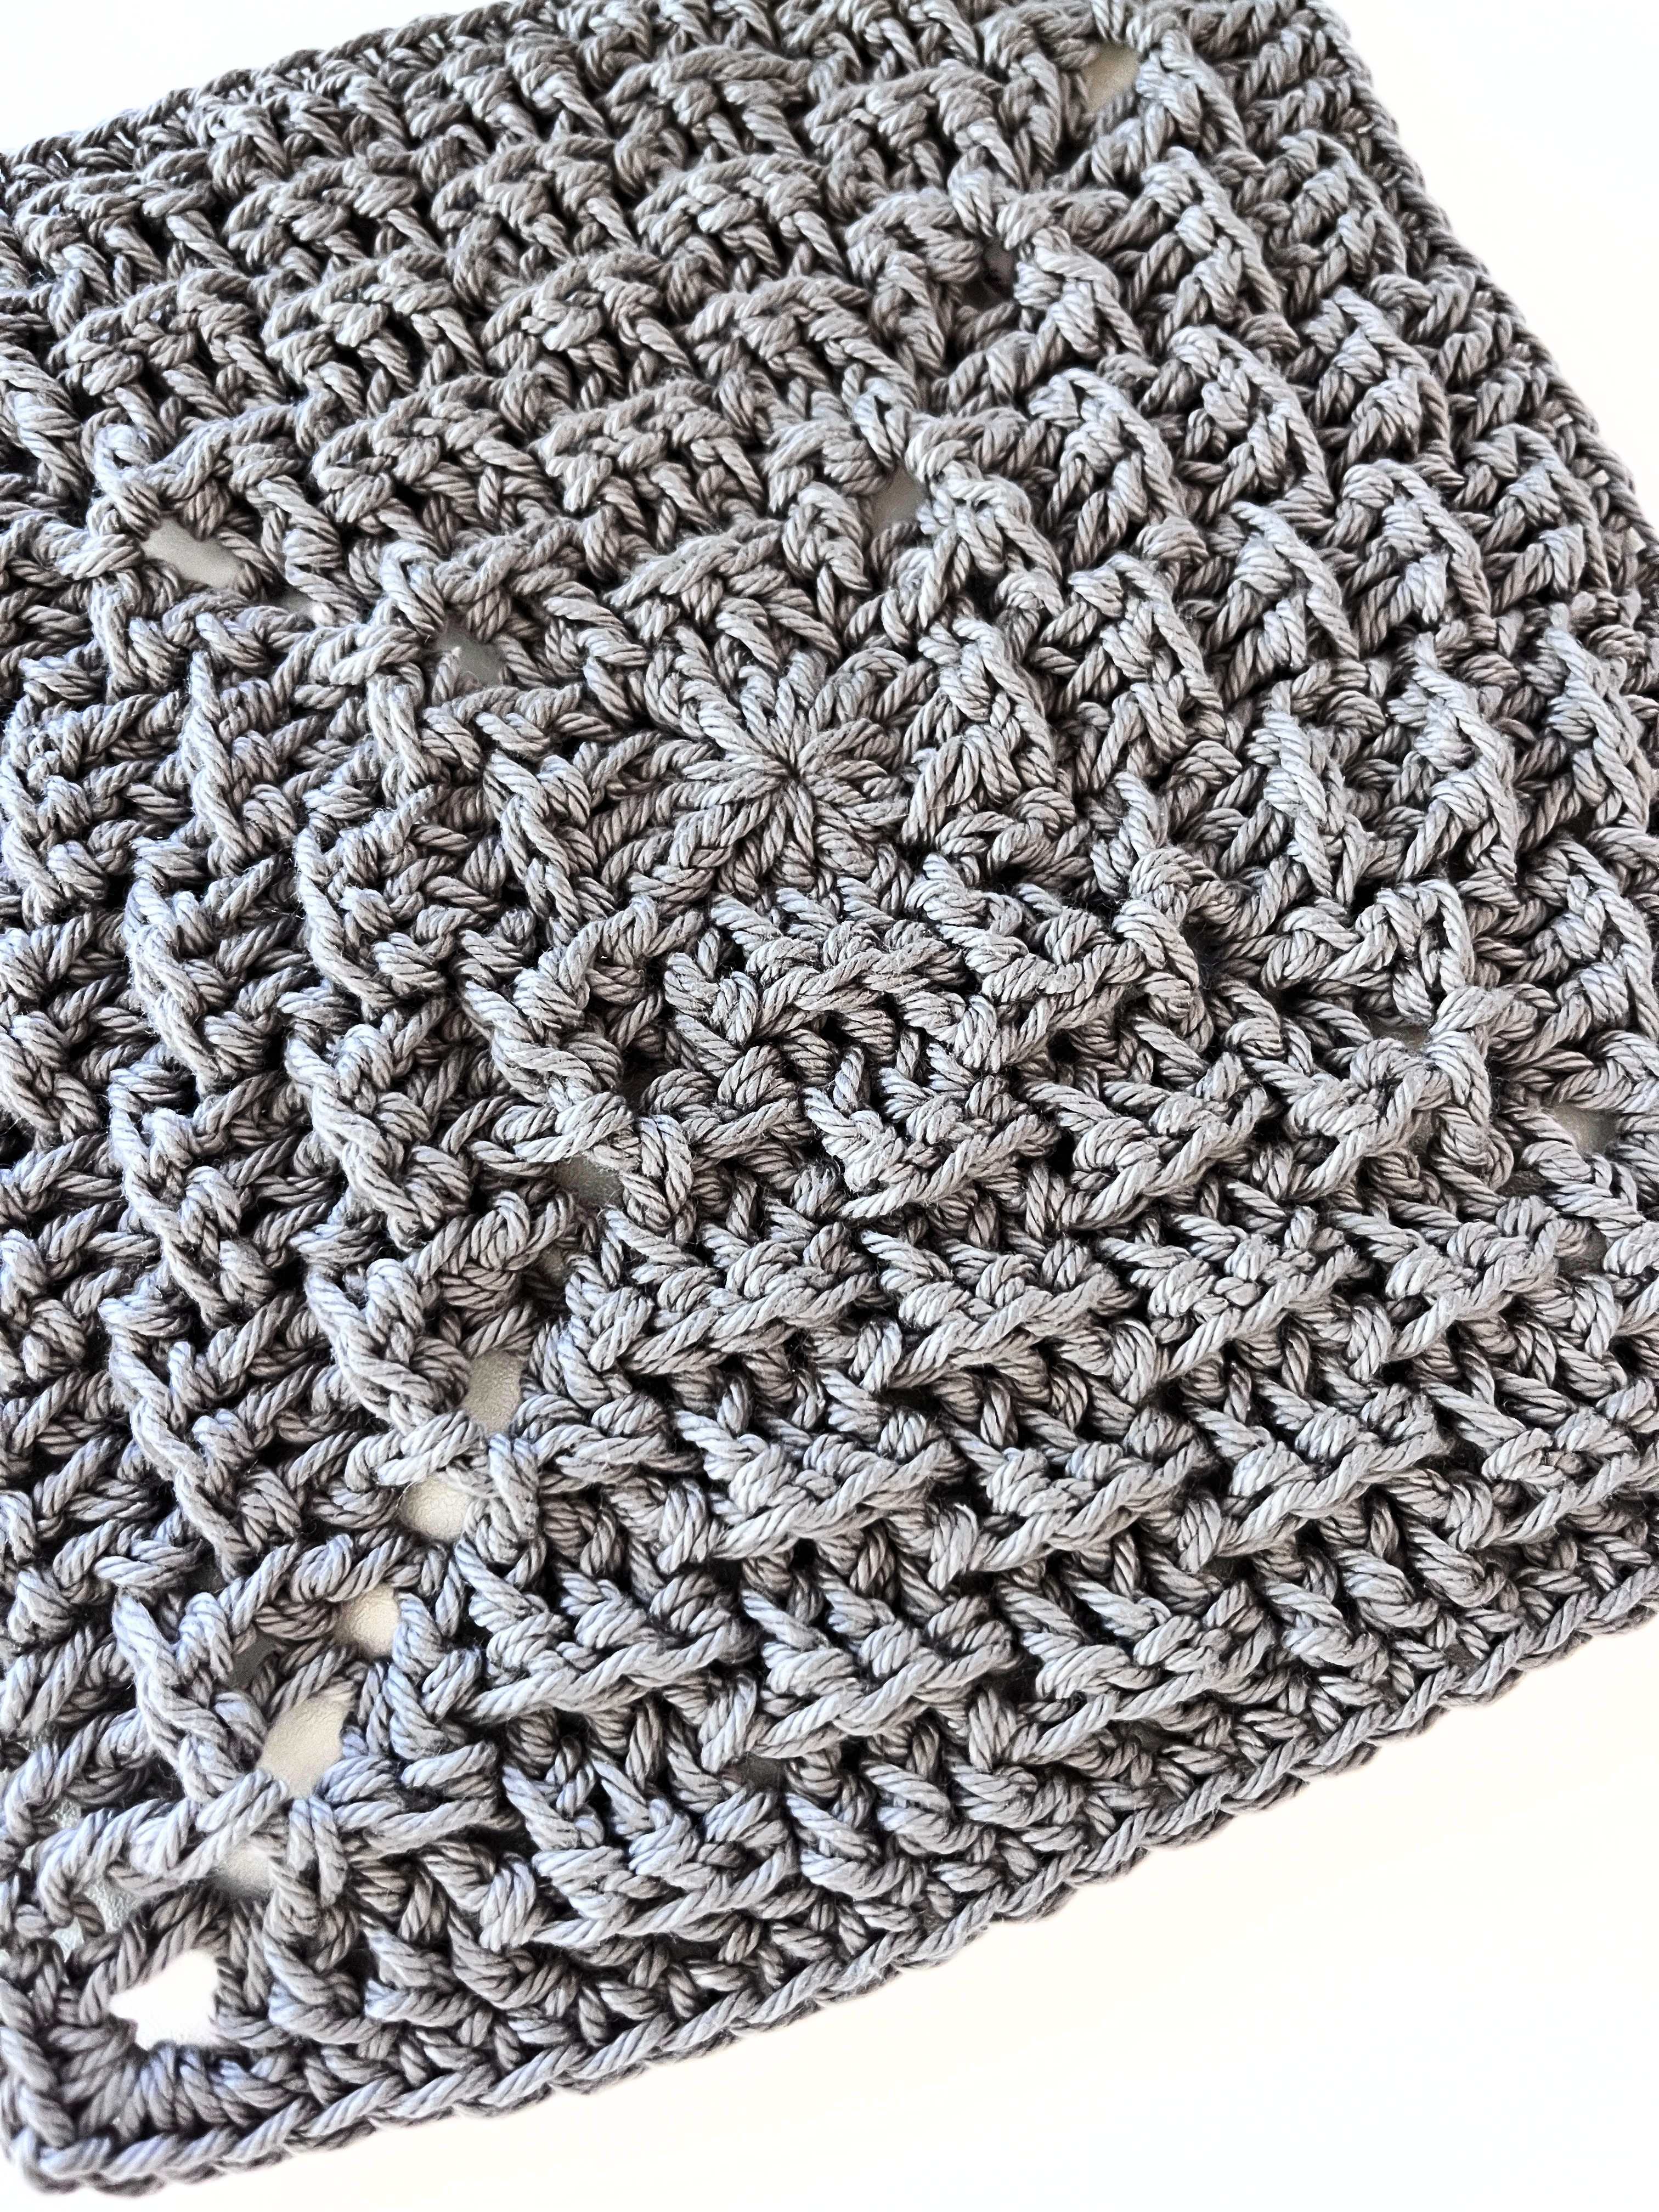
Post Stitch Textured Granny Square
Make magic ring.
Round 1: Working in magic ring, ch 2 (counts as 1st dc), 2 dc, [ch 2, 3 dc] 3 times, ch 2, sl st in top of beg ch to join. (12 dc, 4 ch-2 sps)
Round 2: Ch 1, *FPdc around each of next 3 dc, (dc, ch 1, dc) in corner sp, rep from * around, sl st in first FPdc. (12 FPdc, 8 dc, 4 ch-1 sps)
Round 3: Ch 1, *BPdc around each of next 3 sts, FPdc around next st, (dc, ch 1, dc) in corner sp, FPdc around each of next st, rep from * around, sl st in first BPdc to join. (12 BPdc, 8 FPdc, 8 dc, 4 ch-1 sps)
Round 4: Ch 1, *FPdc around each of next 3 sts, BPdc around each of next 2 sts, (dc, ch 1, dc) in corner sp, BPdc around each of next 2 sts, rep from * around, sl st in first FPdc to join. (12 FPdc, 16 BPdc, 8 dc, 4 ch-1 sps)
Round 5: Ch 1, *BPdc around each of next 3 sts, FPdc around each of next 3 sts, (dc, ch 1, dc) in corner sp, BPdc around each of next 3 sts, rep from * around, sl st in first BPdc to join. (12 BPdc, 24 FPdc, 8 dc, 4 ch-1 sps)
Round 6: Ch 1, *FPdc around each of next 3 sts, BPdc around each of next 3 sts, FPdc around next st, (dc, ch 1, dc) in corner sp, FPdc around next st, BPdc around each of next 3 sts, rep from * around, sl st in first FPdc to join. (20 FPdc, 24 BPdc, 8 dc, 4 ch-1 sps)
Round 7: Ch 1, *BPdc around each of next 3 sts, FPdc around each of next 3 sts, BPdc around each of next 2 sts, (dc, ch 1, dc) in corner sp, BPdc around each of next 2 sts, FPdc around each of next 3 sts, rep from * around, sl st in first BPdc to join. (28 BPdc, 24 FPdc, 8 dc, 4 ch-1 sps)
Round 8: Ch 1, *FPdc around each of next 3 sts, BPdc around each of next 3 sts, FPdc around each of next 3 sts, (dc, ch 1, dc) in corner sp, FPdc around each of next 3 sts, BPdc around each of next 3 sts, rep from * around, sl st in first FPdc to join. (36 FPdc, 24 BPdc, 8 dc, 4 ch-1 sps)
Round 9: Ch 1, *BPdc around each of next 3 sts, FPdc around each of next 3 sts, BPdc around each of next 3 sts, FPdc around next st, (dc, ch 1, dc) in corner sp, FPdc around next st, BPdc around each of next 3 sts, FPdc around each of next 3 sts, rep from * around, sl st in first BPdc to join. (36 BPdc, 32 FPdc, 8 dc, 4 ch-1 sps)
Round 10: Ch 1, *FPdc around each of next 3 sts, BPdc around each of next 3 sts, FPdc around each of next 3 sts, BPdc around each of next 2 sts, (dc, ch 1, dc) in corner sp, BPdc around each of next 2 sts, FPdc around each of next 3 sts, BPdc around each of next 3 sts, rep from * around, sl st in first FPdc to join. (36 FPdc, 24 BPdc, 8 dc, 4 ch-1 sps)
Round 11: Ch 1, *BPdc around each of next 3 sts, FPdc around each of next 3 sts, BPdc around each of next 3 sts, FPdc around each of next 3 sts, (dc, ch 1, dc) in corner sp, FPdc around each of next 3 sts, BPdc around each of next 3 sts, FPdc around each of next 3 sts, rep from * around, sl st in first BPdc to join. (48 BPdc, 36 FPdc, 8 dc, 4 ch-1 sps)
Round 12: Ch 1, *sc in each st across to corner, (2 sc, ch 1, 2 sc) in corner sp, rep from * around, sl st in first sc to join. (108 sc, 4 ch-1 sps)
A Twist on the Traditional Granny Square
This textured granny square offers endless creative possibilities. You can use a single square as a decorative accent, as well as joining multiple squares together for a larger project. The added dimension from the post stitches gives each square a rich, eye-catching appearance that stands out from traditional designs. I hope you find inspiration for all the beautiful ways you can make this pattern your own.
Love this pattern? Don’t forget to Pin the Post Stitch Textured Granny Square Pattern for later. That makes it easy to come back to it whenever you’re ready to start!
The Post Stitch Granny Blanket Square is part of the 2026 Granny Square Month CAL event. For more info on the crochet-a-long, visit Underground Crafter here. You can also get all 30 squares in one bundle here.

The downloadable ad-free PDF is available for purchase in my shops:
Happy Crocheting!

I believe you left out 2 dc after the first ch 2 that counted as a dc in row 1.